

 English
 русский
 Español
Content
- 1 Pre-Installation Planning Before Fitting a Condensing Unit
- 2 Step-by-Step Condensing Unit Installation Process
- 3 Post-Installation Inspection and Commissioning
- 4 Common Condensing Unit Installation Mistakes to Avoid
- 5 Ongoing Maintenance for Long Service Life
- 6 Frequently Asked Questions About Condensing Unit Installation
- 6.0.1 Q1: What is a condensing unit in a refrigeration system?
- 6.0.2 Q2: Can a condensing unit be installed without professional help?
- 6.0.3 Q3: How much does a commercial condensing unit cost?
- 6.0.4 Q4: What is the difference between air-cooled and water-cooled condensing units?
- 6.0.5 Q5: How long does it take to install a refrigeration condensing unit?
- 6.0.6 Q6: Do I need professional help for condensing unit replacement?
- 7 Planning Your Condensing Unit Project
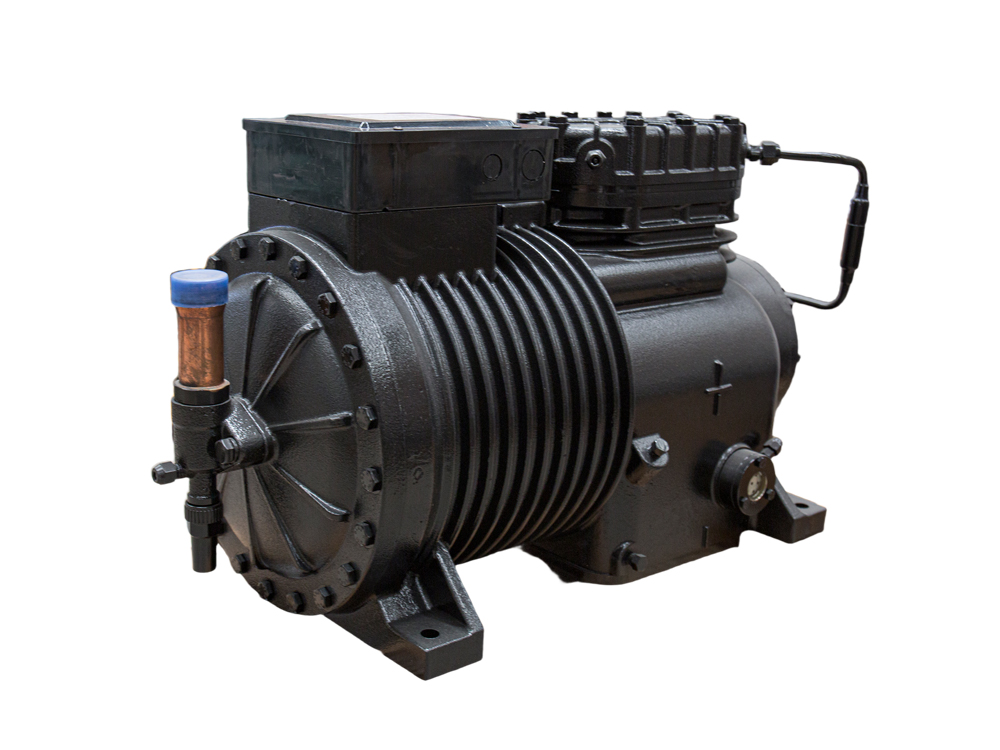
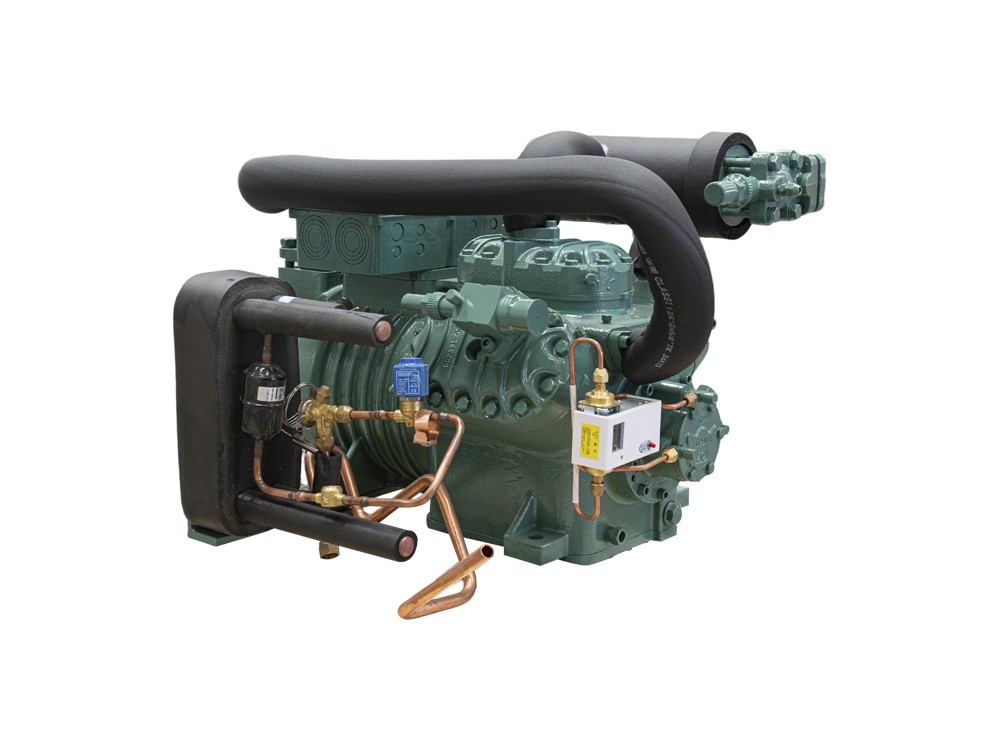
A condensing unit is the outdoor or equipment-room heart of nearly every refrigeration system. It houses the compressor, condenser coil, fan and control components that reject heat collected from the cold space. Whether the application is a cold storage warehouse, a supermarket display case bank, a food processing line or an industrial chilling circuit, the way the unit is installed determines how efficiently it runs, how often it fails and how long it lasts.
Many installation problems do not come from faulty equipment. They come from rushed site preparation, undersized piping, poor ventilation or wiring that does not match the nameplate. In field surveys across commercial refrigeration projects, a large share of early service calls trace back to installation details that could have been prevented during commissioning. A unit placed where hot air recirculates can run at high head pressure for years, quietly wasting energy and shortening compressor life.
This guide walks through the full process: pre-installation planning, step-by-step mounting and connection, commissioning checks, common mistakes and long-term maintenance. Engineers, contractors and procurement teams can use it as a working checklist. If your project requires a unit matched to specific load, refrigerant and voltage data, you can request a quotation and specification sheet through our product page.
Pre-Installation Planning Before Fitting a Condensing Unit
Good installations start on paper. Planning decisions made before the first bracket is fixed will affect performance for the life of the system.
Confirming the Right Size and Specification
Sizing begins with a load calculation covering the refrigerated space, product temperature, heat gains from doors and lighting, and defrost requirements. The selected condensing unit must match the evaporator capacity at the design evaporating temperature. Oversizing causes short cycling and poor humidity control, while undersizing leads to high discharge temperatures and continuous operation at the limit.
- Confirm refrigerant type and compatibility with the existing or planned evaporator
- Check supply voltage, phase and frequency against the nameplate
- Choose air-cooled or water-cooled rejection based on ambient conditions and water availability
- Verify ambient design temperature, since capacity drops as outdoor temperature rises
Tools, Parts and Safety Checklist
A well-prepared crew keeps the job efficient and safe. Standard equipment includes a manifold gauge set, a vacuum pump capable of reaching deep vacuum, a digital micron gauge, a refrigerant recovery unit, flaring and brazing tools, nitrogen for purging, vibration isolation pads and a calibrated charging scale.
| Category | Items | Purpose |
|---|---|---|
| Measuring | Manifold gauges, micron gauge, clamp meter | Verify pressures, vacuum level and electrical load |
| Piping | Copper tube, fittings, flare or braze kit | Leak-free refrigerant connections |
| Vibration | Rubber pads, spring isolators, flexible connectors | Reduce noise and fatigue at joints |
| Safety | Gloves, goggles, lockout tags, fire extinguisher | Protect crew during brazing and electrical work |
Selecting the Installation Location
Location has a larger effect on daily performance than many teams expect. The unit needs unrestricted airflow, so air discharge should not face walls or other equipment, and the condenser inlet should not draw in its own exhaust. Keep the unit away from kitchen exhausts, boiler flues and other heat sources. Provide clearance for coil cleaning, fan service and electrical access, and mount on a level, load-bearing surface such as a concrete pad or steel frame above the expected snow or flood line.
Local Codes and Compliance
Refrigerant handling, electrical wiring and pressure equipment are governed by local and national codes. Confirm requirements for refrigerant charge limits, machinery room ventilation, leak detection and lockout procedures. For export projects, check whether the unit carries the certifications required by the destination market, such as CE marking for European installations, and keep documentation for inspection.
Step-by-Step Condensing Unit Installation Process
The following sequence reflects standard practice for a split refrigeration system with a remote evaporator. Always follow the manufacturer manual, which takes precedence over general guidance.
Step 1: Mounting and Base Installation
Set the unit on its base and check it is level in both directions. Use vibration isolators between the frame and the base to prevent noise and structural transmission. Anchor the unit firmly, because loose mounting causes vibration that can crack solder joints over time. Confirm that the base can carry the operating weight plus snow or wind loads where applicable.
Step 2: Piping Connection to the Evaporator
Route the liquid line and suction line with a continuous slope toward the compressor, keeping lines short and supported at regular intervals. Use clean, dry copper tube, purge with dry nitrogen during brazing, and avoid trapping oil in suction risers. Insulate the suction line to prevent condensation and energy loss. Size the lines for the refrigerant and capacity; undersized liquid lines cause flash gas, and oversized suction lines can fail to carry oil back to the compressor.
Step 3: Electrical Wiring
Wiring must be performed by a licensed electrician. Install a properly rated disconnect and circuit protection, size conductors for the full load current with appropriate margin, and connect the contactor, crankcase heater, controls and fan motors according to the wiring diagram. Establish solid grounding and protect cables from heat, moisture and mechanical damage.
Step 4: Vacuum Pumping and Leak Testing
This is the stage where most avoidable failures begin. Pressure test the system with dry nitrogen first to locate leaks, then evacuate it with a vacuum pump until the micron gauge holds a stable low reading. Moisture and air left in the circuit form acids and reduce efficiency, so do not rely on a simple pressure reading to judge dryness.
- Pressure test with nitrogen at the specified test pressure and hold for the required period
- Repair any leaks found with soap solution or electronic detection
- Evacuate the system through both high and low side connections
- Hold the vacuum and confirm the pressure does not rise beyond the acceptance limit
Step 5: Refrigerant Charging
Charge only the quantity specified on the nameplate or in the installation manual. Use a calibrated scale for weighed charging, and add liquid refrigerant to the liquid side when the system is off or in a controlled manner. Overcharging raises head pressure and can flood the compressor, while undercharging reduces capacity and risks low-pressure cutouts.
Step 6: Initial Startup and Functional Test
Energize the system and observe the compressor, fans and controls through a full cycle. Check suction and discharge pressures against design values, confirm superheat and subcooling, verify fan rotation and airflow direction, and listen for abnormal noise. Allow the system to stabilize before recording final readings.
Post-Installation Inspection and Commissioning
Commissioning confirms that the installed system performs as designed. A short, structured checklist prevents small problems from becoming long-term faults.
| Check | Typical Target | Action if Outside Range |
|---|---|---|
| Suction pressure | Within design range for evaporating temperature | Check charge, expansion device and airflow |
| Discharge pressure | Below high-pressure cutout with margin | Inspect condenser coil, fan and ventilation |
| Superheat | Stable, usually within manufacturer range | Adjust expansion valve or verify charge |
| Noise and vibration | No rattling or resonance | Recheck mounts, pipe supports and fan balance |
| Electrical current | Within nameplate rated amps | Verify voltage, phase balance and connections |
Record all commissioning values in a log. These baseline numbers become the reference point for future service visits and make it easier to spot gradual drift in performance.
Completing installation does not guarantee long-term stability. A documented maintenance schedule is what keeps a condensing unit operating efficiently for its expected service life.
Common Condensing Unit Installation Mistakes to Avoid
Most field failures repeat the same patterns. Recognizing them early saves time and money.
- Poor ventilation: Recirculated hot air drives up head pressure and triggers repeated high-pressure shutdowns.
- Incorrect piping design: Lines without proper slope or traps can return oil poorly and damage the compressor.
- Missing vibration control: Rigid mounting transfers vibration into piping and can crack brazed joints.
- Wrong refrigerant charge: Both overcharging and undercharging reduce efficiency and stress components.
- Non-compliant wiring: Undersized conductors and loose terminals create heating, nuisance trips and fire risk.
Field experience suggests that a meaningful share of compressor replacements in the first few years are linked to moisture or air left in the circuit after rushed evacuation. Taking the extra time at this stage is one of the highest-return decisions on any project.
Ongoing Maintenance for Long Service Life
A condensing unit should be inspected on a regular schedule, with more frequent checks in dusty, coastal or high-temperature environments.
- Clean condenser fins to restore heat rejection and keep airflow unrestricted
- Inspect pipe insulation, supports and joints for vibration wear or leaks
- Tighten electrical terminals and check contactor condition
- Perform periodic leak checks and verify charge against the logged baseline
- Compare operating pressures and current with commissioning records
Air-cooled units mainly need coil cleaning and fan inspection, while water-cooled units require water treatment, scale control and checks on the water circuit. If an older unit is approaching the end of its useful life, a planned replacement with a matched condensing unit is usually more economical than repeated emergency repairs, and bulk quotations are available for multi-site operators.
Frequently Asked Questions About Condensing Unit Installation
Q1: What is a condensing unit in a refrigeration system?
A condensing unit combines a compressor, condenser coil, fan and controls in one assembly. It compresses refrigerant vapor and rejects the absorbed heat to the surrounding air or water, allowing the refrigerant to return to the evaporator and repeat the cycle.
Q2: Can a condensing unit be installed without professional help?
Mounting and basic layout can be handled by experienced technicians, but refrigerant handling, brazing, vacuum work and electrical connections require trained and certified personnel. Improper work can cause leaks, compressor damage and safety hazards.
Q3: How much does a commercial condensing unit cost?
Price depends on capacity, refrigerant type, rejection method, control features and certification requirements. Installation labor, piping and electrical work add to the total project cost. Providing your load data and voltage requirements is the fastest way to obtain an accurate quotation.
Q4: What is the difference between air-cooled and water-cooled condensing units?
Air-cooled units reject heat directly to ambient air and are simpler to install, with no water circuit to maintain. Water-cooled units transfer heat to a water loop, which can provide higher efficiency in hot climates but requires cooling towers or water supply and additional treatment.
Q5: How long does it take to install a refrigeration condensing unit?
A standard small or medium system is typically installed within one to three working days, including piping, wiring and evacuation. Larger multi-circuit or cold storage installations may take a week or more depending on site access, pipe length and commissioning requirements.
Q6: Do I need professional help for condensing unit replacement?
Yes. Replacement involves refrigerant recovery, system flushing where needed, correct sizing checks and recommissioning. Engaging a qualified contractor helps ensure the new unit matches the existing evaporator and that the warranty requirements are met.
Planning Your Condensing Unit Project
Whether you are a contractor, facility manager or procurement specialist, the right equipment choice starts with accurate project data. Share your refrigeration load, operating temperature, refrigerant preference and site conditions to receive a suitable proposal, including specification sheets and pricing for single units or bulk orders.
| Project Data to Prepare | Why It Matters |
|---|---|
| Cooling load and evaporating temperature | Determines correct capacity |
| Refrigerant type | Ensures compatibility with the system |
| Voltage and phase | Confirms electrical matching |
| Ambient design temperature | Sets capacity under peak conditions |
| Installation site type | Guides cooling method and enclosure |


 Contact Number:+86-18858565929

